For my first foray into describing how I use Ableton Live, I figured I’d start with what I actually use it to do and what gear I need to make that happen. A pretty typical Wits session will look something like this (click thumbnails to see full size):

If you’re super-new to Live, the basic gist of the screen you’re looking at is this:
- The columns (titled “Monitor,” “Radio Feed,” “Stage,” etc.) are individual audio and MIDI tracks.
- The cells in each column and row can hold clips, which hold snippets of audio or MIDI data.
- The rows, (titled “Billboard,” “Please Explain,” “Guttersnipe,” etc.) are scenes, and once triggered will play all clips in its row.
Left-to-right, you can read through the track titles and get an idea of what I use Live for during a show. In this case:
- To create a blended in-ear monitor mix;
- to have reference tempos available for each musical section of the show;
- to act as a sound module for a drum trigger pad and keyboards on stage;
- to play loops or backing tracks as needed.
It’s pretty convenient to have all of this happening in one Live session, on one laptop, but no drummer’s odyssey would be complete without a metric ton of gear, right?
Hardware
My audio interface, used to get audio into and out of “the box,” is a MOTU 4Pre. I’ve had a lot of luck with MOTU interfaces; they’re not too expensive, sound great, and are rock solid on my Macbook Pro. Personally, I’ve found that solid drivers are one of the most critical elements of any interface, and MOTU’s are among the best around if you’re using a Mac. The 4Pre has four mic inputs and four line outputs, perfect for just about everything I use Live for, and a nice half-rack form factor which works well with my MOTU Micro Lite.
The Micro Lite is my MIDI interface, which will send and receive MIDI to and from up to five sources. These interfaces connect together to form one large interface (yes, like Voltron, you nerd) which slots nicely into a small rack, like so:
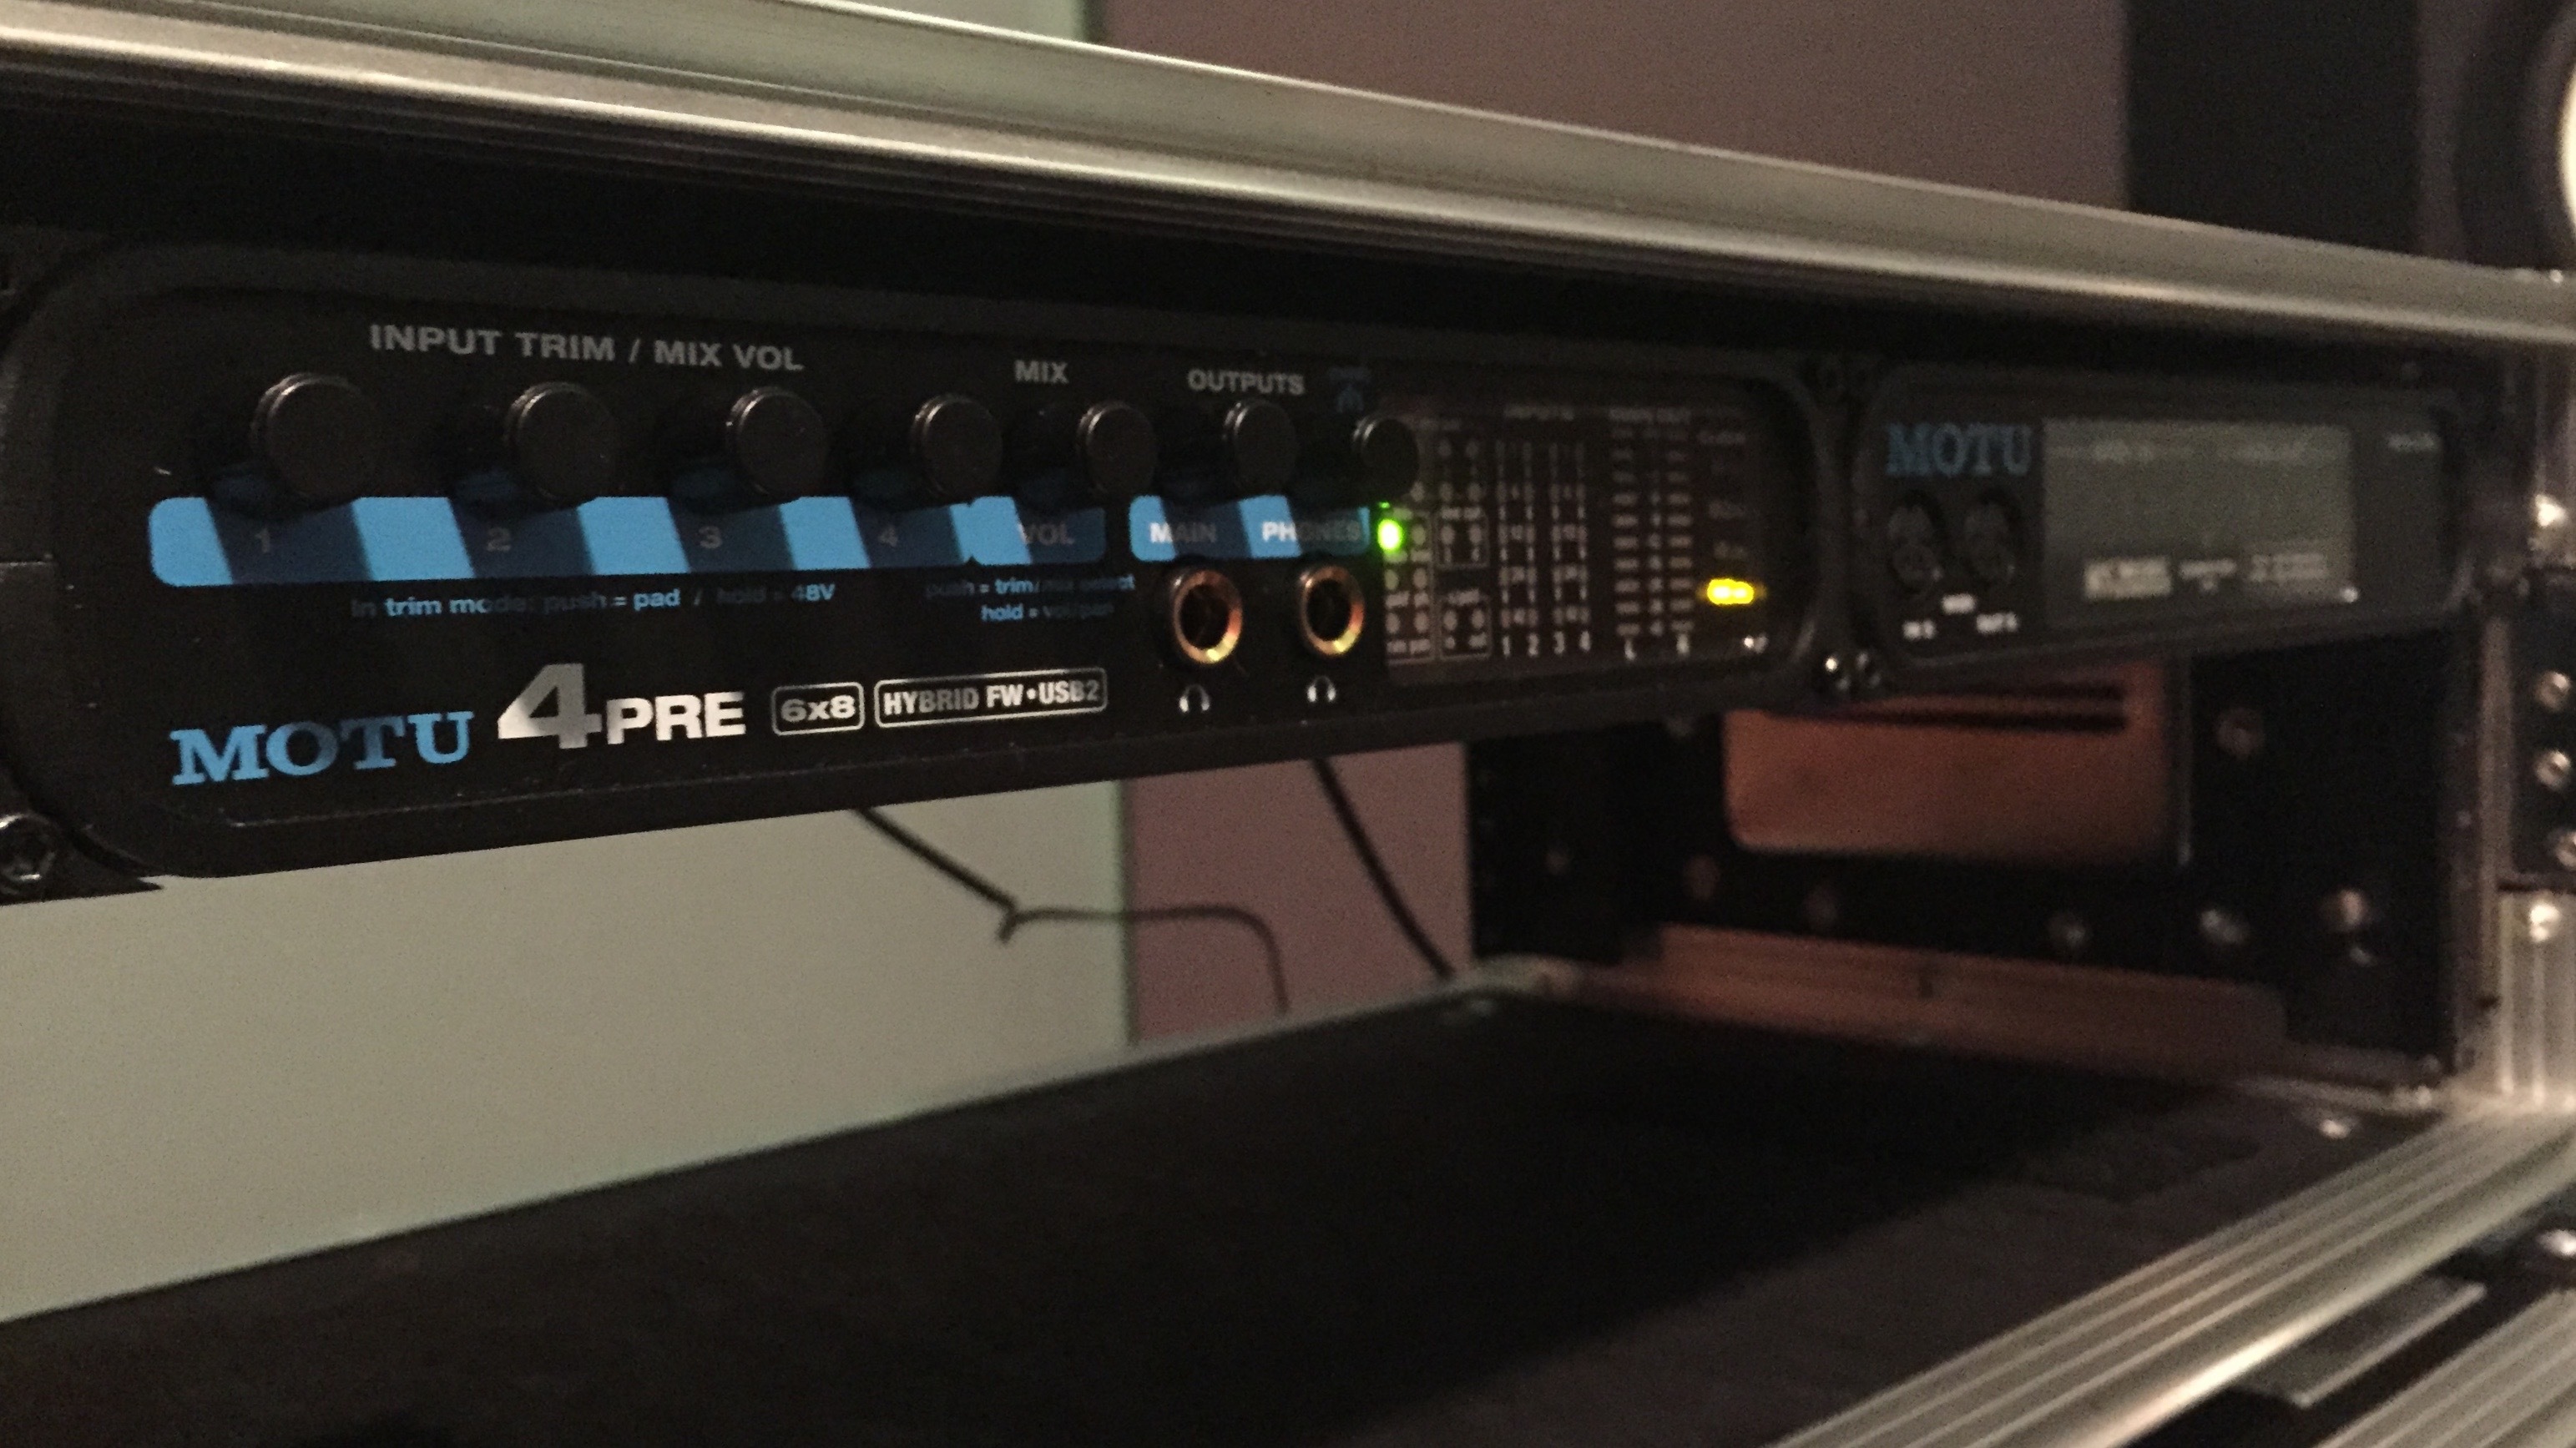
Why the two interfaces, you ask, and not just your typical interface with MIDI built in? Well, the biggest reason is, on Wits, we use more than one MIDI source on stage, and it’s much easier to use the Micro Lite than it is to daisy-chain MIDI connections. Having individual MIDI channels also makes it super-convenient when routing MIDI controllers to specific tracks — more on that later. Suffice it to say, the 4Pre and Micro Lite make a great combination and cover a lot of ground.
The Micro Lite receives MIDI from, at least, two controllers onstage. My main MIDI controller, which I use to navigate around Live, launch clips and scenes, and play sounds, is a Roland SPD-SX. Having a set of drum pads available is super convenient, both because I can navigate the session with drumsticks in my hand, and also because I can also play sounds from the same controller.
Here is the thing about the Roland — it is stupid overkill for what I need it to do. I originally bought it as an alternative to using Live, figuring that its sampling capabilities and software would make it more convenient than hauling around a laptop and interface. But the truth is, Live is so much quicker to setup and integrate (and with Wits, so many things are done on-the-fly) than the Roland, so the SPD-SX remains a glorified MIDI controller. Any pad controller with programmable kits (Alternate Mode’s Drumkat, Alesis’s ControlPad) would work great. But the SPD-SX lights up, so, there’s that! I also use a Boss FS – 5U footswitch, plugged into the SPD-SX’s footswitch input, to toggle Live’s play and stop button (more on this in a bit).
The other controller that usually lives on the Wits stage is an Alesis QX49, played by Janey Winterbauer, Wits’s singer/keyboard player extraordinaire. Occasionally, if I need more session control or to play additional keyboard sounds, I’ll also plug in an Akai MPK mini.
In a later post I’ll go more into more detail about how the controllers work with Live and make their various noises, but for now this sums up the basic MIDI gear.
Each output of Live is sent through a DI to the front of house. I used to use a Little Labs Redeye, which is an amazing tool in every way, but in the end I’d prefer something with more channels. For now I just use the house DIs for each signal I need to send.
Software
Obviously, to use Live onstage you’ll need a copy of Ableton Live. I use the Live 9 Suite, which is insanely expensive compared to the slimmer versions but come with every instrument you’ll ever want and a huge grip of sounds and samples. It’s been worth the dough to me, but for years I’ve used the Standard version, and even the Intro version is more than enough to fit a lot of needs.
One thing that makes Live useful is its MIDI Mapping feature, which allows you to “map” any MIDI note from any source to a specific button in Live. But one thing that’s not mappable is the keyboard’s space bar, which happens to toggle Live’s play and stop buttons. How I get around this is by using MidiStroke, which is a great freeware utility to convert incoming MIDI notes to keyboard commands. Remember that Boss footswitch? I assign it a MIDI note in the SPD-SX, then tell MIDIStroke to change that note into a spacebar press.
In-Ear Monitoring
Last on the gear list are my in-ear monitors. I’m not a huge fan of using IEMs live, but they’re pretty indispensable for click tracks. Also, the drums on the Wits stage are surrounded by walls of insulation; usually IEMs can make me feel isolated, but in this case they help me hear my place on stage. I’ve used a bunch of custom-fit and universal IEMs over the years and my favorite are Westone’s — I tend to use my “back up” UM1s more than the waaaaay more expensive custom-fit brand I own.
And Finally…
Everything plugs together, is routed through Live, and output through the 4Pre to the house engineers. In my next post I talk about the basic routing and show how I get the IEM mix happening. If you have any questions, feel free to message me and I’ll try to work an answer in somewhere.