Welcome back, I say to you but mostly to myself, to a series of posts on how I use Ableton Live. I started these posts back in 2015, a year where I was a lot more optimistic about what I could accomplish in my free time. A lot has changed since then—Wits, the show I was using as my example scenario, is no more; I’ve experimented with and evolved my Live workflow a bit; American democracy is collapsing with the election of a narcissistic tyrant by a gullibl…actually, can we forget that last one, just for today?
Anyway, where were we? Ah, yes, Live. It turns out that Live is pretty aptly named; it’s arguably more well-known as a programming tool but it’s also a powerful and versatile source of instrument sounds that you can play in real-time.
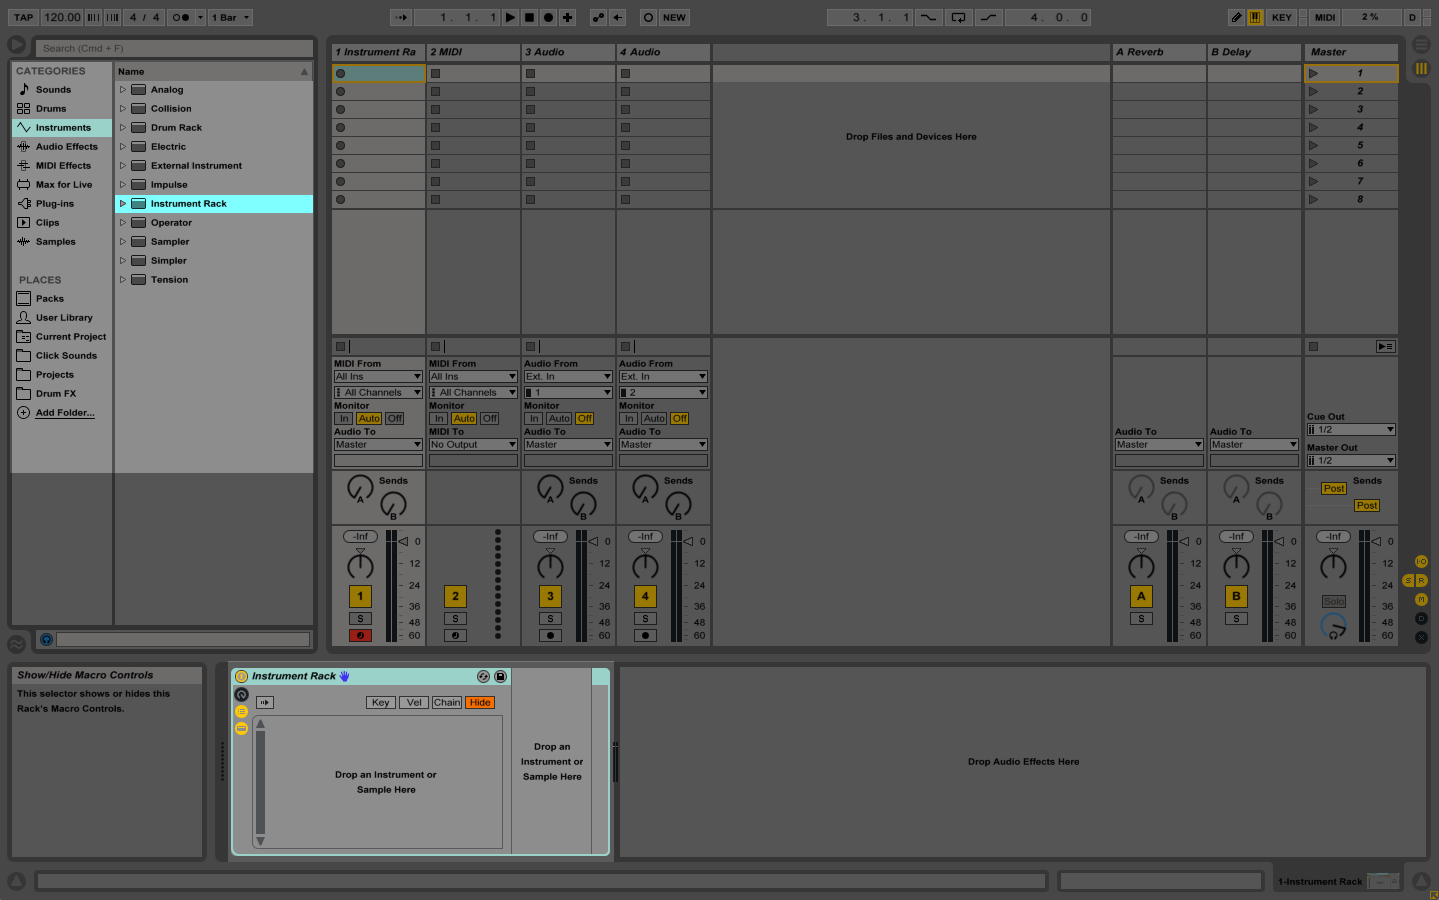
The Amazing Instrument Rack
Among the devices in Live is a collection of Instruments, which are essentially sound sources you load onto MIDI tracks. A typical install of Live gives you an array of instruments to experiment with but the hero of our story and the main topic of this post is the Instrument Rack:
Live’s Racks are one of its most powerful tools, and if you haven’t already spent a bit of time in the Reference Manual learning about them, I’ll wait while you do so. (I’ll just assume you did that from this point on.)
An Instrument Rack, at its heart, is a group of instruments and effects. You could bundle a organ sound with a super wet reverb into a Rack, call it, say, “Super Soaker Organ,” save it somewhere, and it would be available to drag into a MIDI track, with all your settings intact, at any time. You can also put an Instrument Rack inside another Instrument Rack, and you can put that super bundle of racks into anothe rInstrument Rack, until your racks all are just straight up Incepted throughout your session.
Instrument Racks also give you an array of tools to navigate and control the devices bundled within the Rack. What you end up with is a compact and easy method to store and recall any sounds you might need to play during a show. Great, right? Not sure yet? Okay, I’ll walk you through an example of how I put them to use.
The Sound Track
“Hello,” says a band to me in my imagination. “We need someone to play a few keyboard sounds. A super-reverb-ed organ on one song, some brass hits on another, and a sort of rhythmic string thing on a third. Can you do it?”
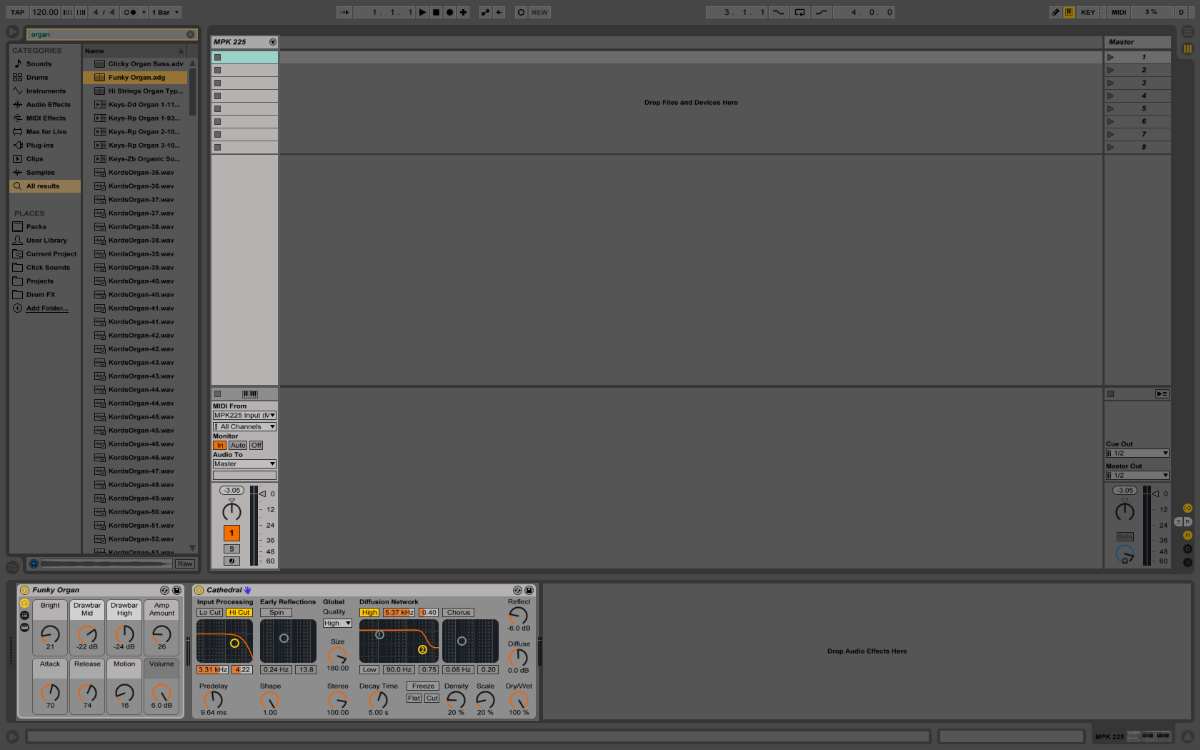
“No problem,” I would say, ignoring my lack of keyboard ability for now. I have Ableton Live and a controller (an Akai MPK 225), so all I need to do is find the right sounds and set up the session. First on the agenda is to create a track in my Live session to act as a sound bank for my controller. I’ll first:
- create a MIDI track (I’ll title it “MPK 225”);
- set the MIDI input to monitor the MPK, and;
- set the Monitor mode to “In,” which insures I’ll always hear the audio without needing to put the track into record mode.
Next, I’ll add a sound source so I can hear audio. I’ll browse through Live, find an organ sound and a reverb preset, and drag them to the track. For now, I’ll leave the audio routed through the master bus. Here’s what I have so far:
Finally, I’ll select these two Devices and type ⌘-G. (Windows users, consult your documentation/incantation.) Voila! It’s an Instrument Rack. Let’s expand it and check out the various parts contained within:
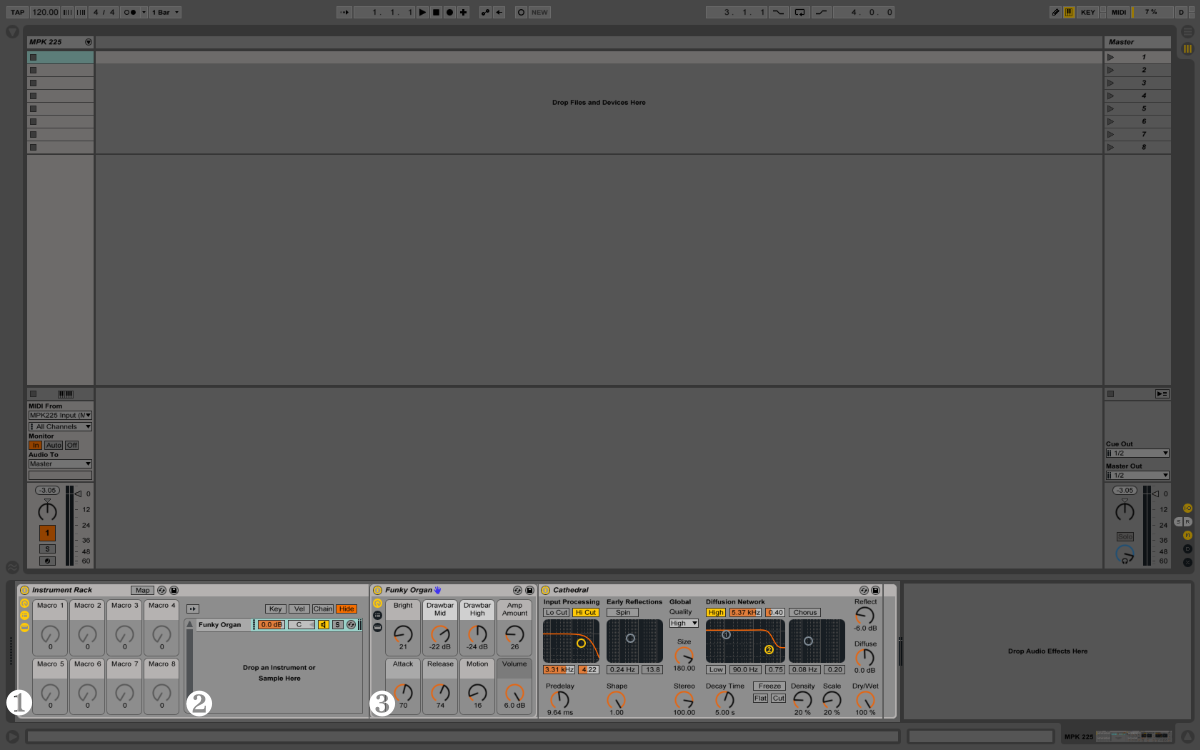
Each Instrument Rack has three main sections:
- Macros, eight knobs you can use to control Devices within the Rack;
- the Chain List, which contains all the groups of devices in the Rack, and;
- the Device Chain, these devices we’ve grouped together; in this case, our one chain is the organ through a reverb.
I’ll name this Rack “Super Soaker Organ.” If I give the controller a tickle, I’ll hear the Super Soaker through the master bus. Great! But I only have one sound, and I need a few more. What’s next?
The Chain Gang
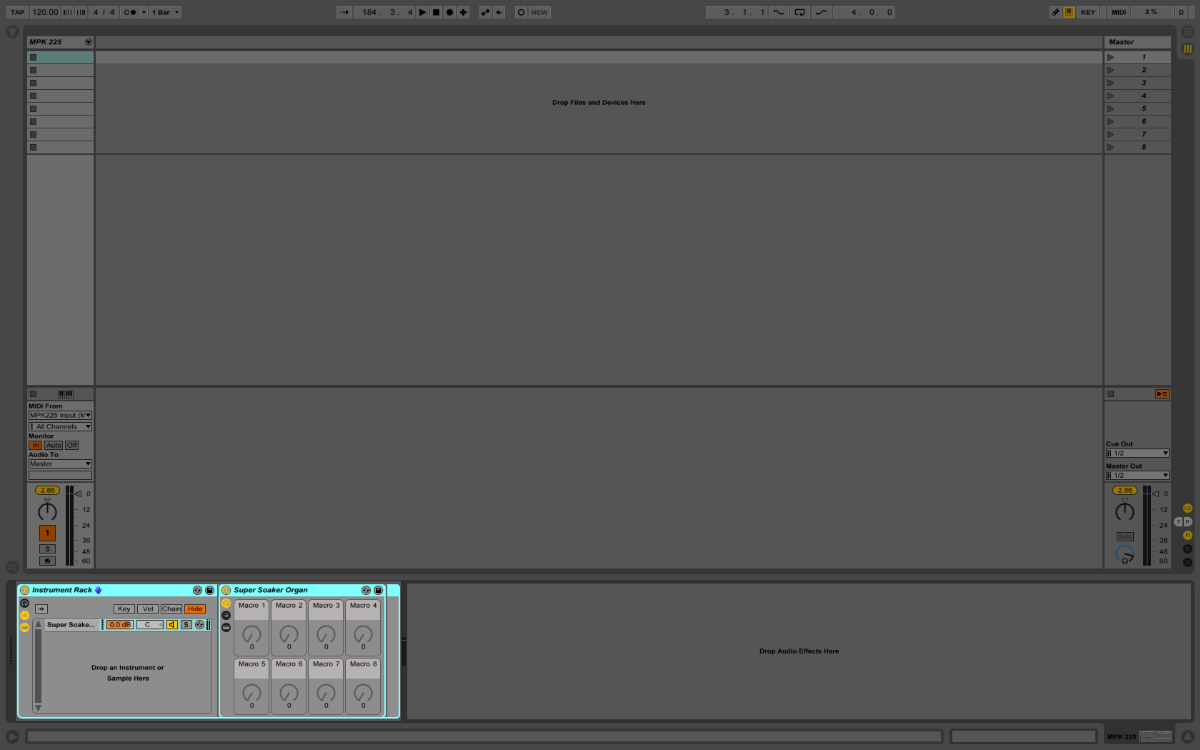
What I have is an Instrument Rack that holds our Super Soaker. What I want is a Rack that’ll hold more than one sound source, and a way to switch between them. I’ll create a new Instrument Rack and bring Super Soaker inside — the fastest way to do this is simply select the Super Soaker rack and hit ⌘-G again:
I’ll name this new Rack “MPK Presets,” find the other sounds I need, and add them to the Rack by dragging them into the empty area in the Chain List:

Now I have three Device Chains in my Rack. These chains are stored and played in parallel, which is to say the Rack will send MIDI from the MPK through every chain simultaneously. In other words, we’ll hear all instruments played at the same time unless we filter the incoming messages somehow. We can do this in three ways:
- By Key, which assigns the MIDI note range a Device Chain will accept;
- by Velocity, which — you guessed it — states at which velocity a Device Chain will accept a signal;
- and, by the Chain Select Ruler, which is a selectable range of 0 – 127. This is the tool we need.
Clicking on “Chain” will show the ruler. The orange Chain Selector is at zero, and the blue bars that indicate each Chain’s zone are also at zero — selector and zones align, so all chains will play a signal from the MPK. Move the selector to any other number in the ruler, and — since no other numbers are included in a Chain’s zone — no chains will play. Finding a way to easily position this selector is our key to switching between sounds.
Here’s How It Happens
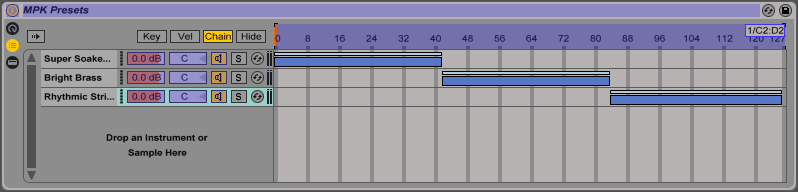
Like most things in Live, the Chain Select Ruler is assignable via MIDI, and it’s easy to assign it to a knob on the controller. ⌘-M, click the Ruler, move our knob, and we’re in business — twisting the knob will now sweep the selector through its range. If we assign wide zones to each Device Chain, like so…
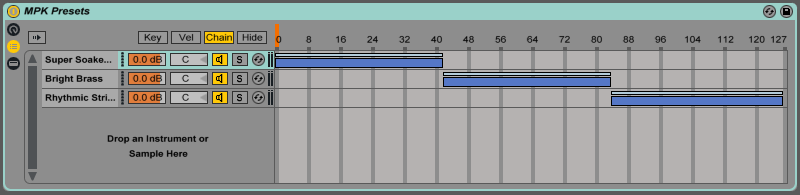
…we’ll have a pretty wide range of knob movement to select each sound. Turning the knob to left will select the “Super Soaker Organ”; a knob in the middle (somewhere between 45 – 80 in this example) will select “Bright Brass”; a knob towards the right will select the “Rhythmic String Arp.” Easy! And convenient — if we only have a few sounds to choose from and a free knob.
That’s How It Could Have Happened
Turning a knob to select sounds is easy enough but isn’t the most precise method. But, like most sweepable controls in Live, we can also assign the Chain Select Ruler to a range of MIDI notes. ⌘-M again, click the Ruler, and this time we’ll press, say, the C key on the controller, hold it, and then press a C key one octave up. Presto! We’ve assigned an octave of MIDI notes to the Ruler: pressing C will move the selector to zero, pressing C# will move it a little higher, pressing D, a little higher still.
On our controller, we could assign one button a MIDI note of C, the second C#, the third D, then map this range of notes to the Ruler. It’d look something like this:
Pushing the first button would select “Super Soaker”; the second, “Bright Brass”; the third, “Rhythmic String Arp.” The push-button approach, once set up, is almost foolproof, and considerably more intuitive than spinning a knob and hoping for the best.
Up until recently, this was the method I used for changing patches on songs (using MIDI clips instead of buttons to trigger the appropriate notes). But, for my uses, I found it wasn’t super-flexible if I needed to add more songs or move things around. Thankfully, I found a better approach.
But Here’s What Really Happened
Turns out there a method to move the chain selector around, with precision, without needing to map it to anything. Enter the clip envelope.
Let’s go back to our example. I’ve got a “master” Instrument Rack holding all the presets for my MPK. Now, I’ll go to the MPK’s MIDI track and add a clip to the first scene. I’ll make the clip super short, turn off any looping, and change the launch quantization to “none.” This gives me a clip which will fire instantly and hang around just long enough to send out some automation:
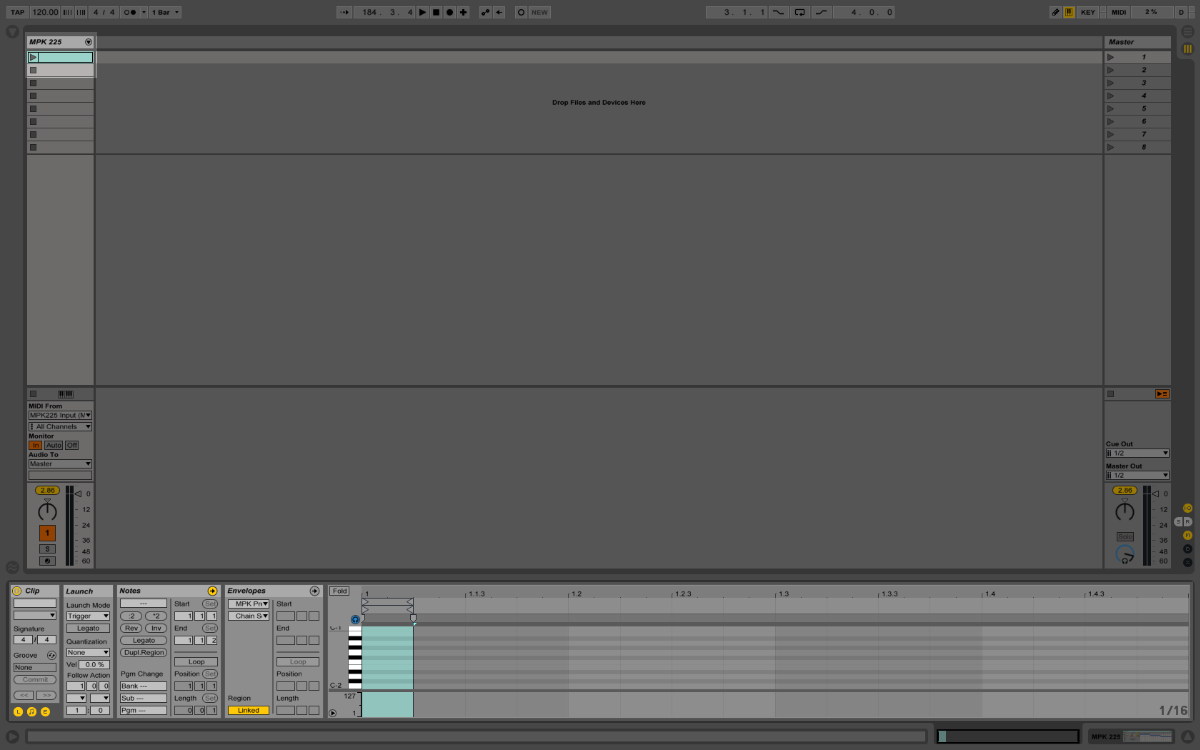
Next, I’ll click on the “Envelopes” window of the clip view. Clip envelopes are sneakily powerful; essentially, they allow us to automate almost anything contained within the clip’s track. In our case, I’ll use it to control the Chain Selector. I’ll select my rack, “MPK Presets,” in the Device Chooser, select the Chain Selector, and write the automation by adding a breakpoint to the red line and moving it to the number “1.” It’ll look like this when done:

I’ll do the same two more times, adding a clip and adjusting the envelope to send the Chain Selector to “2” and “3,” respectively. Finally, I’ll adjust the zones in the Instrument Rack to match. To tidy things up, I’ll title the clips and the scenes with the appropriate song names. My finished session looks something like this:
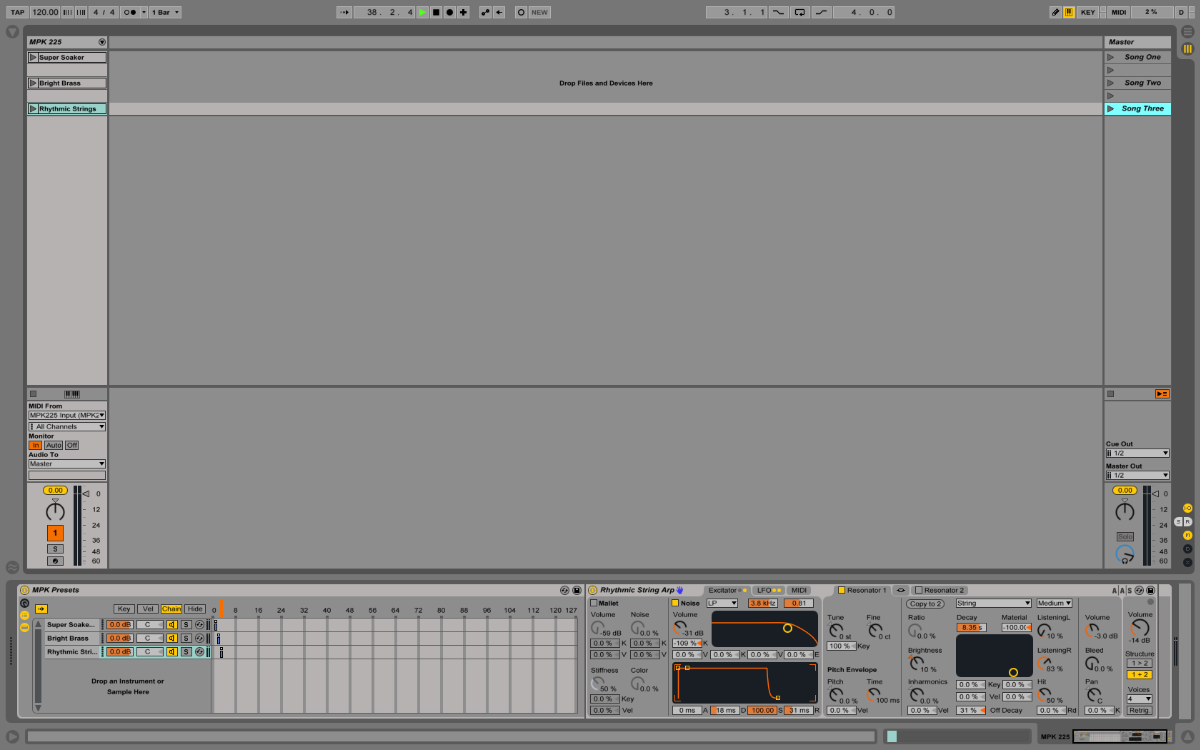
When I load this session up at the show, changing keyboard sounds will be as easy as firing off a scene for each song.
In the Bank
I use this technique with the Twilight Hours to assign sounds to the free pads on my SPD-SX. It’s easy to set up, rock-solid in use, and, once you get the hang of it, really fast to make changes or add sounds. The best part is, you can save your Rack, with all of its presets, and recall it for any use, with all of your settings intact. Cool!
The one drawback is all of the chains in the Rack are loaded into RAM and ready-to-play. If you have a lot of them (or if they’re particularly resource-intensive) you’ll start to see a strain on your CPU. I personally haven’t run into any problems (yet!) but if you do, stay tuned — there’s a bonus post coming soon with a solution.
Phew! You and I covered a lot of ground in this one. But, really, this walk-through of Instrument Racks is barely scratching the surface of what they’re capable of. As you get more comfortable with them, and start exploring the Chain List a little more, you’ll find you’ll be able to squeeze as much functionality out of your controllers as you can muster.
I hope you found this post helpful! As always, feel free to get in touch if you have questions or suggestions. My next, and last, entry in this series will detail how I incorporate loops and backing tracks into my sessions. I’ll see if I can keep the writing and editing process down to less than two years this time.