Here’s the second of a bunch of posts about how I use Ableton Live. In my first post I talked about lots and lots of gear, and, as it turns out, most of that gear actually does something!
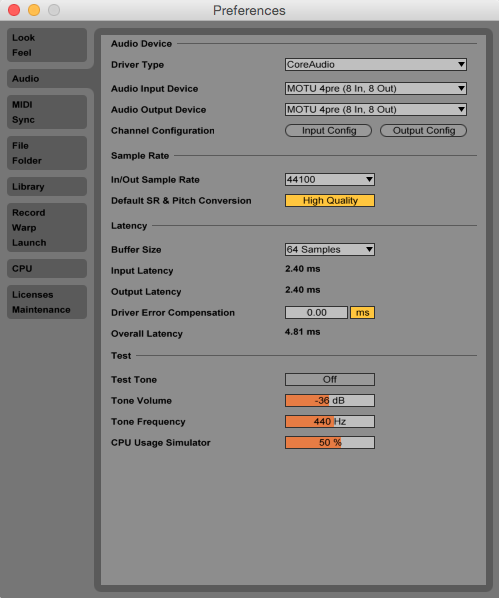
The 4Pre handles all the audio coming into and out of Live and needs to be set up first. That’s done in the Audio tab of Live’s preferences:
Honestly, I’m kinda assuming you know how to do this stuff already. But, just in case, it’s also important to select the inputs and outputs you actually want active, which is done via the “Input Config” and “Output Config” buttons:
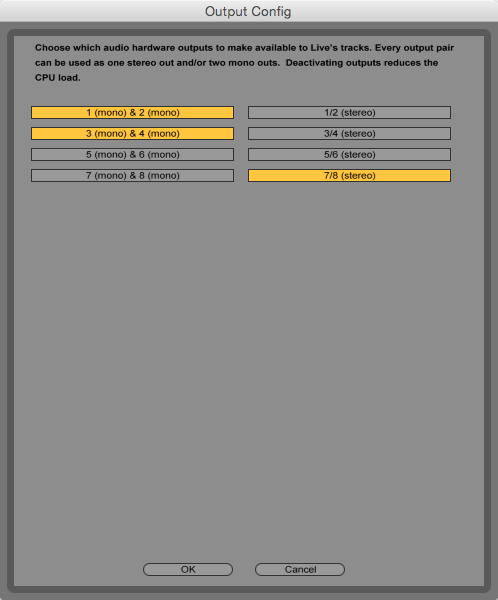
The less I/O you have active, the less of a strain Live will be on your computer, so I like to activate only what’s needed; for me, that’s the 4Pre’s four mic inputs, four line outputs, and headphone channels (outputs 7 and 8).
Back in Live’s Preferences, I’ll usually keep the sample rate at 44.1 and the buffer at 64 samples, which keeps things relatively latency-free.
The Monitor Mix
With Wits, the most basic and consistent need from Live is an in-ear monitor mix. A bare bones session will look something like this:
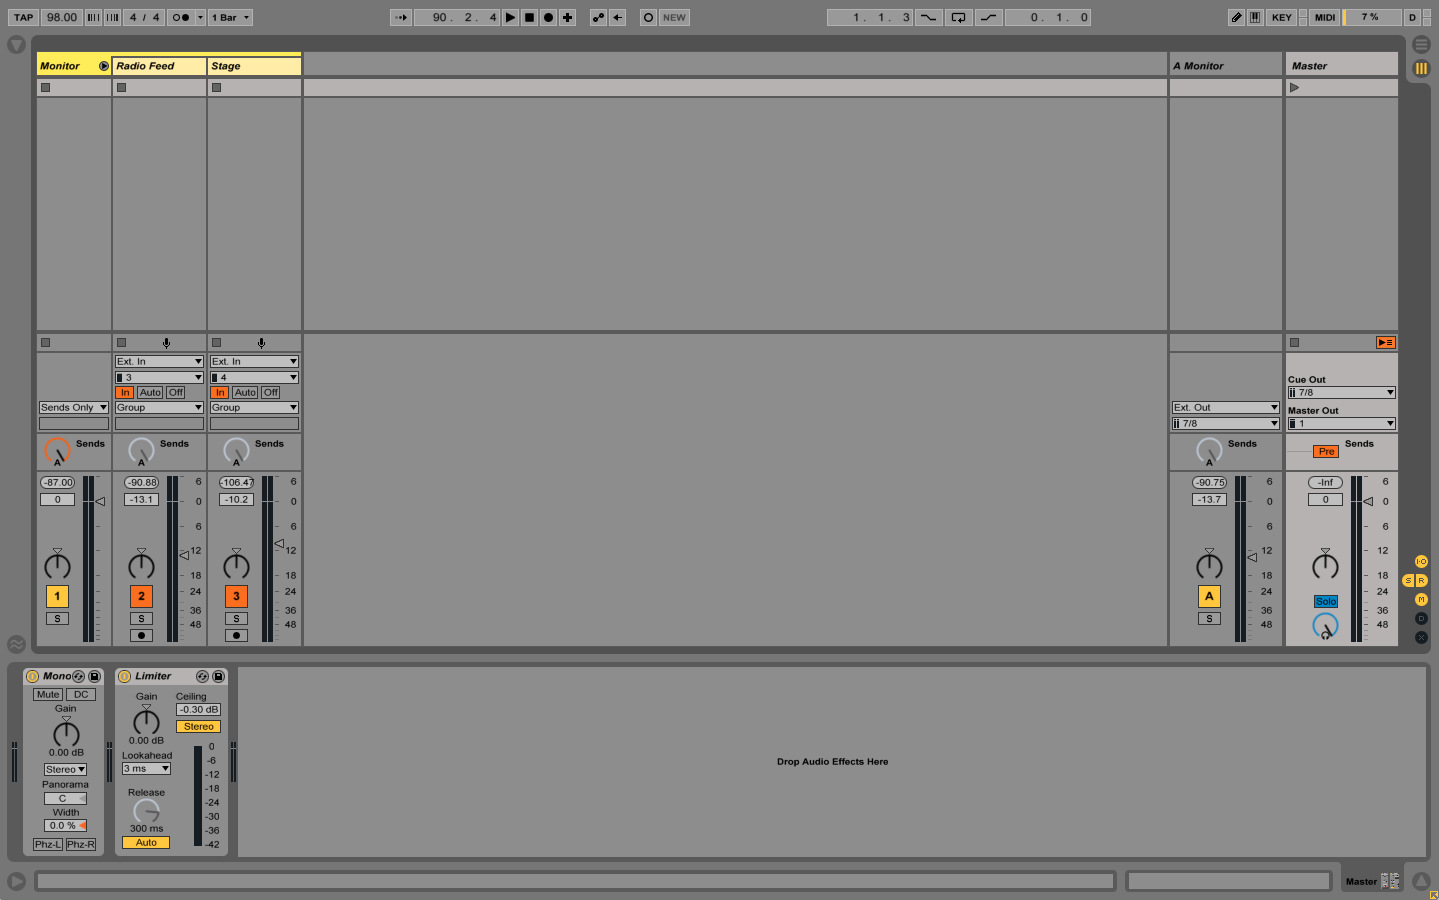
There are five tracks on this session; the tracks on the left make up the monitor mix, the tracks on the right are the mix busses. As you can probably guess, “Monitor” is what I listen to, and “Master” is the default feed to the house engineers.
A monitor mix for Wits can be tricky; not only are there music cues and the primary need to hear what’s happening with the music guests, but tons of cues come from the voice actors during sketches as well. My situation is made a lot easier thanks to Wits’s broadcast engineer Corey Schreppel, who sends out a broadcast-ready mix from the sound booth.
That broadcast mix takes care of the dialogue and most of the music needs, but the drums are pretty quiet on it, and it’s hard to get a sense of my place in the stage volume. So, I also have a mic set up off stage, pointing towards the band. A blend of the two sources makes for a really easy soundcheck and near-perfect monitoring situation.
Both the broadcast mix and the stage mic are sent to me at mic-level via XLR cables. I plug those into the preamps on my 4Pre and create two corresponding tracks in Live, “Radio Feed” and “Stage.” Those two tracks are grouped together; the group’s bus is titled “Monitor.” Then I create a return track, also titled “Monitor.”
Routing
The routing for all this is set up in Live’s I/O:
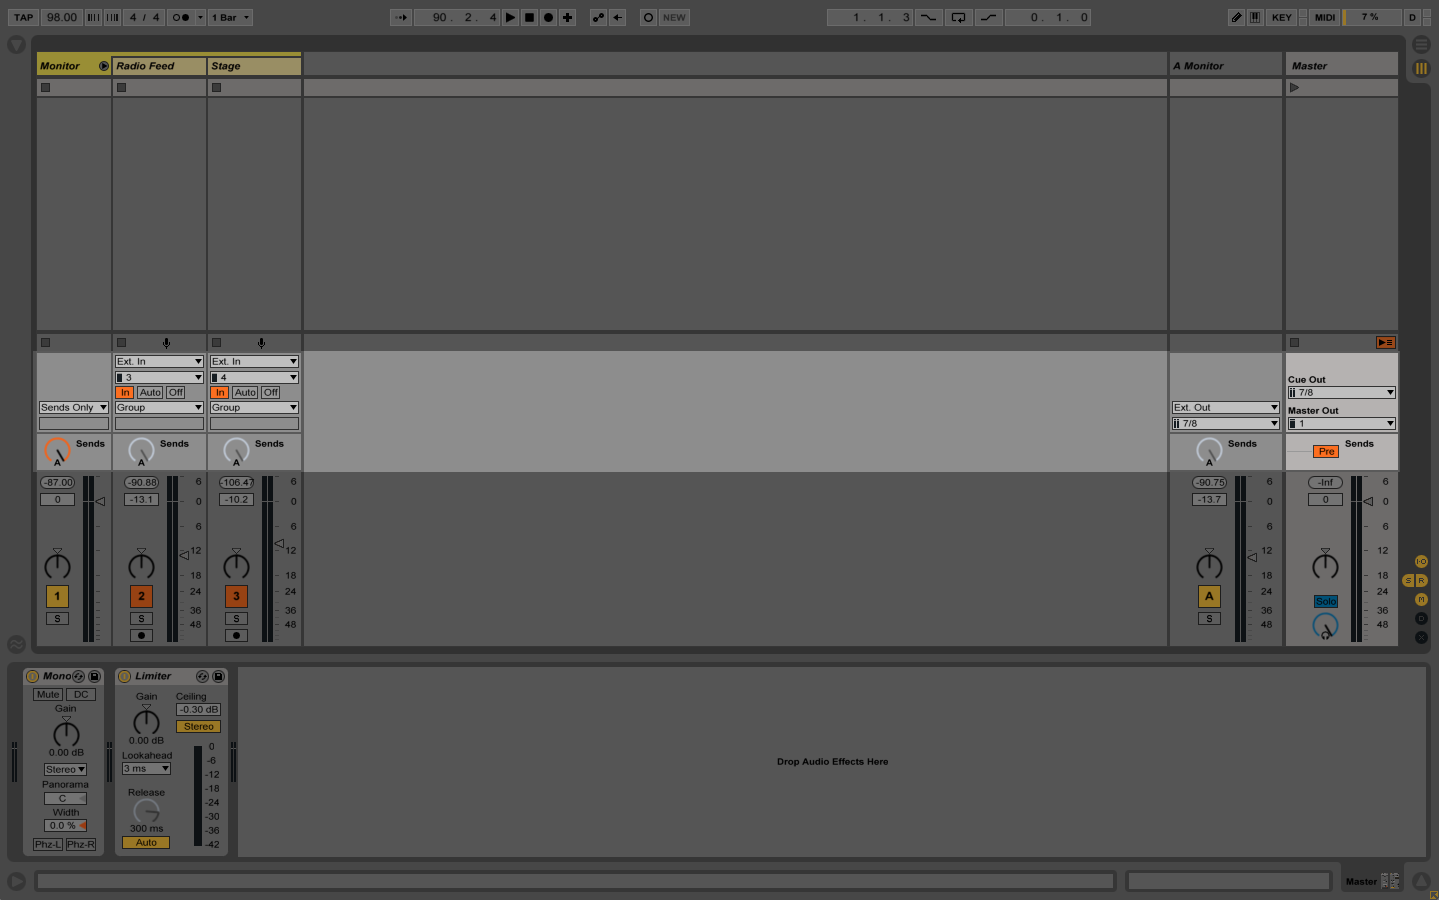
The inputs for the broadcast mix and the stage mic are both set to “Ext. In” (that’s the 4Pre) and their respective inputs (3 and 4). Monitoring is set to “In,” which means the signal is always being heard regardless of the transport status. The outputs are set to the group bus, and output of the group bus, Monitor, is set to “Sends Only.” This sends the audio ONLY to the return tracks and not to the Master mix bus.
The send knob “A” on each track controls how much signal goes to the “A” return track; in this case, Monitor. Finally, the Monitor output is set to external outs 7 and 8, the 4Pre’s headphone output.
If you’re new to Live, or mixing in general, this might seem a little convoluted (if you’re not new to Live or to mixing, it’s safe to wake up now) but after some time you’ll see what’s happening is pretty simple — all of your monitor sources are bussed via sends to a return track, which is sent to the headphones. Easy peasy.
I usually throw a few effects on the tracks — some compression (usually the “Mix Gel” preset on the Monitor bus), a high-pass EQ to cut the stage rumble — but most importantly I put Live’s Utility effect and a limiter on the Monitor return:
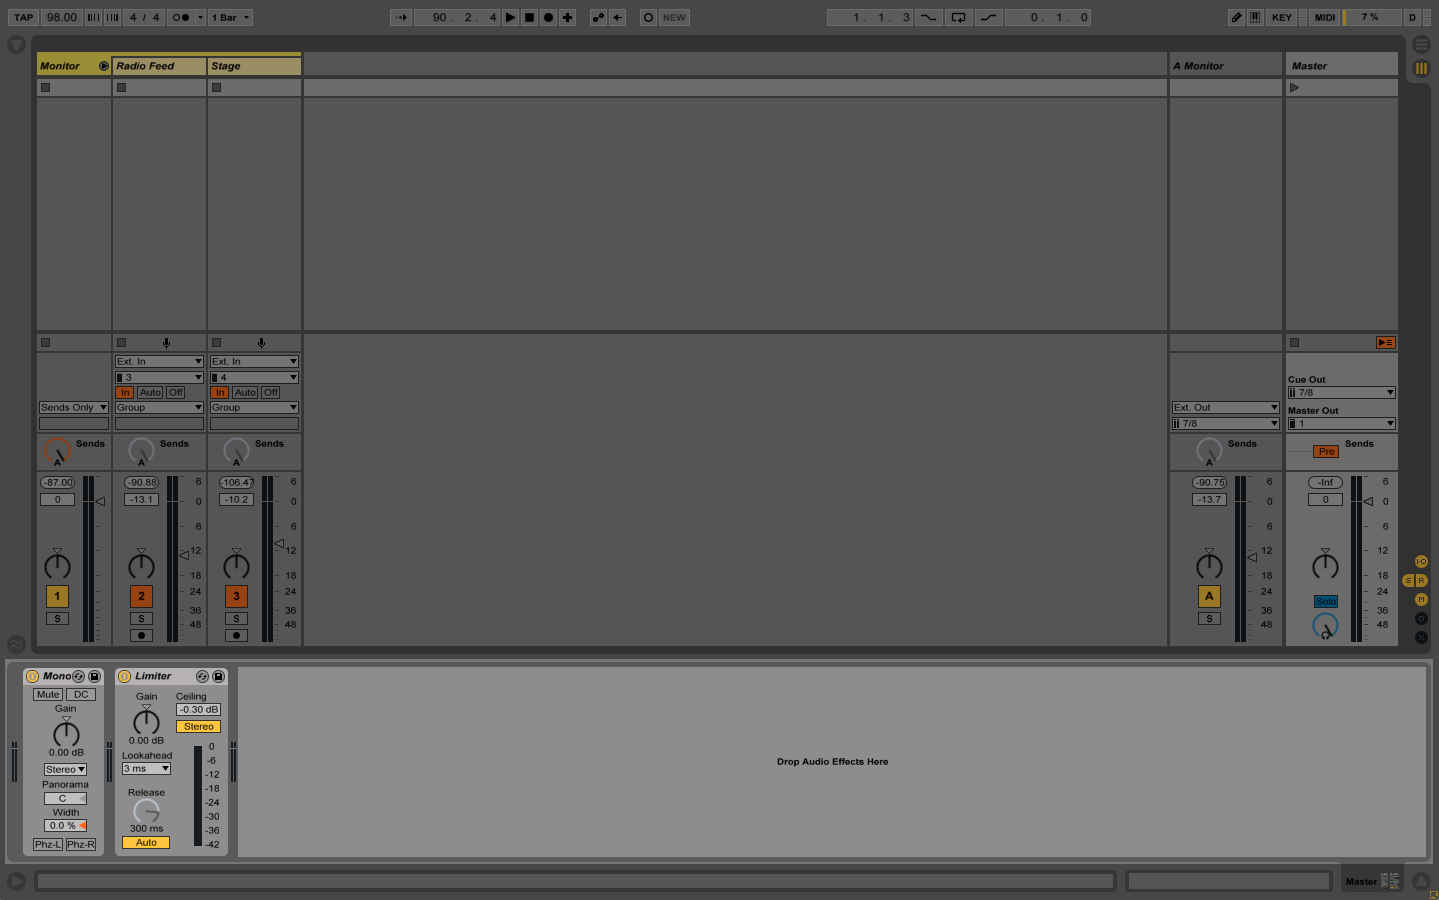
Since sounds are being sent to the house in mono, I want to make sure to listen to whatever’s happening in Live in mono as well. The Utility plugin takes care of this; setting its width to 0% effectively sums the left and right channels. The limiter is in place to keep any audio spikes from frying my monitor mix and, in turn, my eardrums.
The same effects are put on the Master bus; keeping things mono at the bus helps me monitor the meters appropriately, and the limiter is a safeguard against any distortion from clipping.
I set the “Cue Out” of the Master bus to “7/8” — this sends Live’s metronome and other cue-only signals to the headphones — and the “Sends” button to “Pre.” The pre-fader setting means all track sends are monitored before their volume is adjusted by faders. This way, the mix being tweaked for the house won’t affect the return tracks; i.e., my monitor mix.
Mix It Up
In the end, what I end up with is a great in-ear mix I can set up fast and tweak from onstage. I can adjust the levels between mix sources, add any effects I need, and adjust the overall level of the monitor mix easily by adjusting the fader on the Monitor bus, mapped to a knob on my SPD-SX.
Of course, one big reason for using in-ears in the first place is to have a sneaky way to listen to click tracks; my next post describes how I set them up and navigate the session. In the meantime, feel free to send me a message if you’ve got a question, or want something explained, in more detail, very badly.